Exporting USD from Maya
Tested with Autodesk Maya 2026.3.
Overview
The goal is to produce a single, self-contained USD file with all geometry, materials, and textures using relative paths. The general workflow is:
- Open or import your source file
- Build the scene (geometry and materials)
- Set units
- Set color management
- Export USD
- Add lights (via USD Layer Editor)
1. Open File
- Launch Maya.
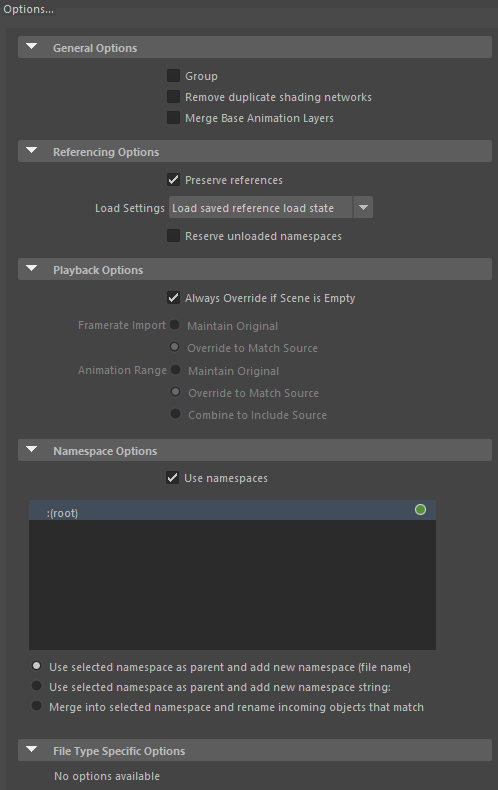
- If importing an asset (USD, OBJ, or FBX): File → Import...
- Click Options... and under Referencing Options enable ☑ Preserve references.
- Click Import.
- Open Hypershade and confirm that all textures are correctly referenced from your texture folder.
2. Set Units
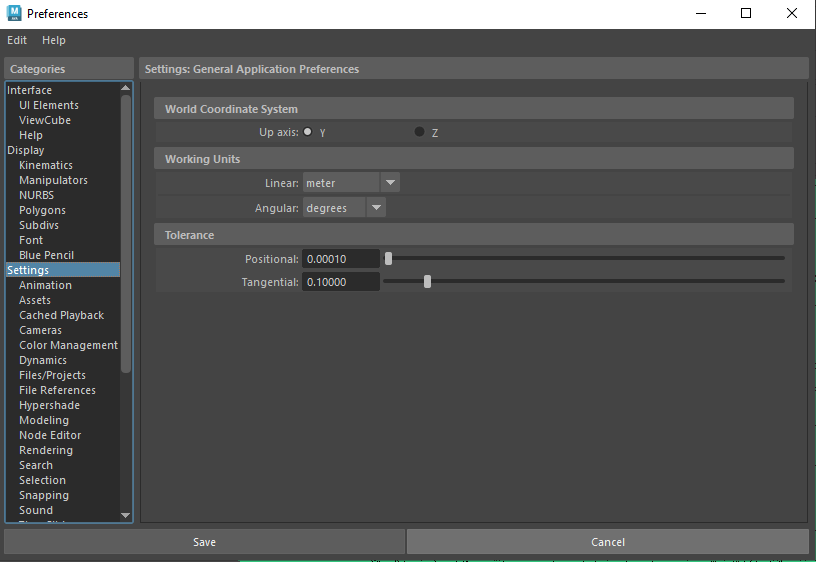
- Go to Windows → Settings/Preferences → Preferences.
- Under Categories → Settings → Working Units, set Linear to meters.
- Click Save.
3. Set Color Management
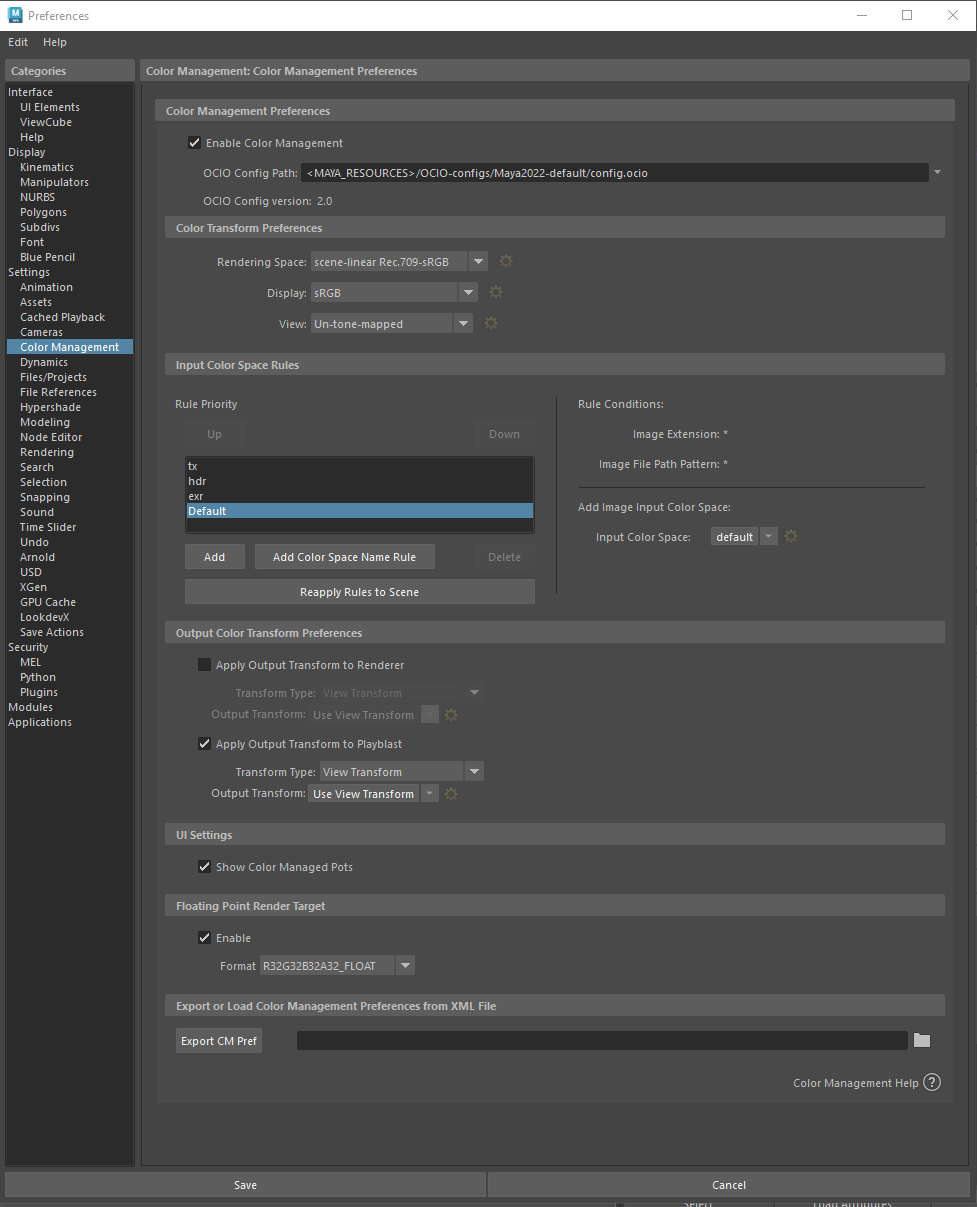
- In Preferences, go to Categories → Color Management.
- Under Color Transform Preferences, set:
Note: These values are pending confirmation. Verify with your pipeline before using.
Setting | Value |
|---|---|
Rendering Space | scene-linear-Rec.709-sRGB |
Display | sRGB |
View | Un-tone-mapped |
4. Build Scene
- Create or adjust geometry as needed.
- Open Hypershade and create materials (Lambert, Blinn, or Phong), adding textures from your texture folder.
Tip: Apply materials only to the meshes that require them.
LookdevX (MaterialX)
If you need MaterialX materials, open the LookdevX Graph Editor, create a new MaterialX, and add your desired surface material. This method is secondary to the standard Hypershade workflow.
5. Export USD
- Go to File → Set Project..., choose the folder containing your texture folder, click Set, then click Create default workspace.
- File → Save to save the current scene.
- Go to File → Export All...
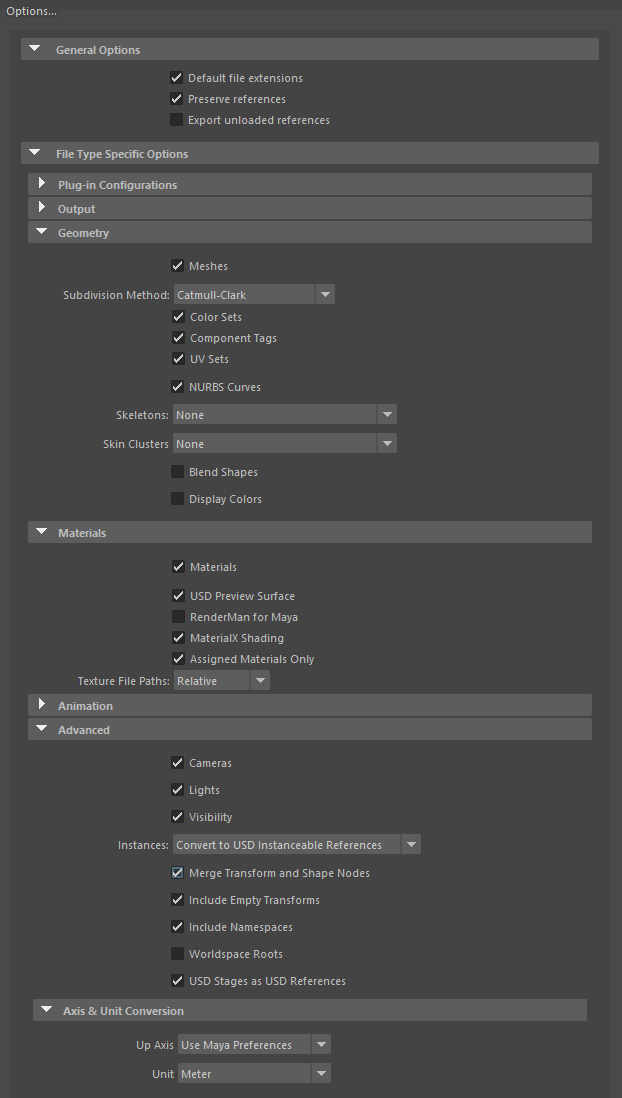
- In the export options panel, configure:
- General Options → ☑ Preserve references
- Materials — select the shading material used in the scene:
- ☑ USD Preview Surface
- ☑ MaterialX Shading
- Texture File Paths: Relative
- Set File name to
YourFileName.usd. - Set Files of type to USD Export.
- Click Export All.
6. Add Lights
Caution: Lights will appear significantly darker in Miris than they do in the Maya viewport. If you want an effective Intensity of 2 and Exposure of 2, try starting with Intensity: 10, Exposure: 9 and adjust from there.
Directional Light
Go to Create → Lights → Directional Light and adjust its position and intensity.
Dome Light (via USD Layer Editor)
To add a dome light or other USD-native lights, use a separate USD layer:
- Open a new scene in Maya.
- Go to Windows → USD Layer Editor.
- Click Create → Stage From File..., select your exported USD file.
- Enable ☑ Make Path Relative to Scene File, then click Create.
- In the Outliner, right-click your mesh and choose Add New Prim → All Registered → Lighting → DomeLight (or any other desired light type).
- Adjust the Intensity, Exposure, and Rotation of the light.
- To assign an HDRI:
- Select the Dome Light → Color Map → click the folder icon.
- Select your HDR file.
- Enable ☑ Make Path Relative to Edit Target Layer Directory.
- Click Open.
- Save the USD: right-click the USD layer in the Layer Editor → Save Edits, then click Save.

Updated on: 21/04/2026
Thank you!