Exporting USD from Blender
Tested with Blender 5.0.1.
Example scenes: Download example Blender scenes from Google Drive.
Overview
The goal is to produce a single, self-contained USD file with all geometry, materials, and textures using relative paths. The general workflow is:
- Open or import your source file
- Build the scene (geometry and materials)
- Add lights
- Set units
- Set color management
- Export USD
Walkthrough Video
Blender USD Export Walkthrough
1. Open File
- Delete the default Camera, Cube, and Light from the scene.
- Import your source asset using one of the methods below.
USD
Go to File → Import → Universal Scene Description (.usd*).
- Enable General → ☑ Relative Paths.
- Click Import USD.
OBJ
Go to File → Import → Wavefront (.obj).
- Make sure the
.objand.mtlfiles are in the same folder, with textures in a subfolder. - Select your file and import.
FBX
Go to File → Import → FBX (.FBX) and select your file.
2. Build Scene
If you need to create or adjust materials:
Tip: Apply materials only to the meshes that require them.
- Open the Shading workspace.
- Create a New Material.
- Build a node graph: Image Texture → Principled BSDF (or Diffuse BSDF) → Material Output.
- Click Open, select your texture, and click Open Image.
- Click Unpack Item to embed the texture reference.

Once the scene is complete:
- File → Save As... — save into the folder that contains your texture folder, then click Save As.
- File → External Data → Make Paths Relative.
- File → External Data → Unpack Resources → Use files in original location (create when necessary).
3. Add Lights
Caution: Lights will appear significantly darker in Miris than they do in the Blender viewport.
- Go to Properties → Render Properties → Render Engine and set it to Cycles.
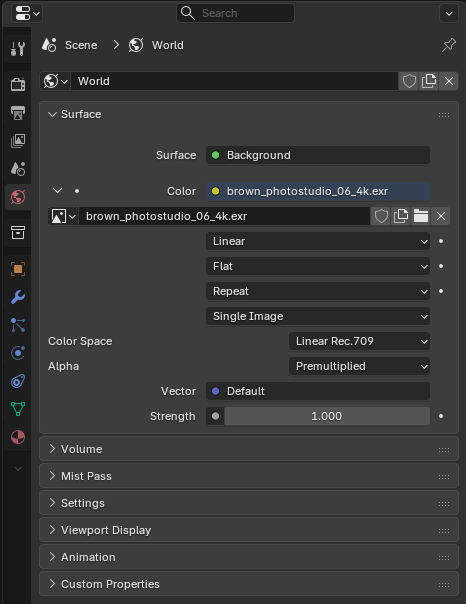
World / HDRI
- Go to Properties → World Properties → Surface → Color → Environment Texture.
- Click Open, select your HDRI, and adjust the Strength setting.
Compensating for lighting differences
To match Miris rendering, boost the world lighting in the Shading workspace:
- Open the Shading workspace and switch to the World context.
- Move the Background node out of the way.
- Press Shift + A → Utilities → Vector → Vector Math → Multiply.
- Set the Multiply vector to
(500, 500, 500)— multiply this value by your desired exposure. For example, if your exposure is3, use(1500, 1500, 1500). - Press Shift + A → Shader → Background and set Strength to
1000. - Connect: Image Texture → Multiply → Background → World Output.
Note: This node graph is what you will be exporting. The viewport will appear blown out — this is expected.
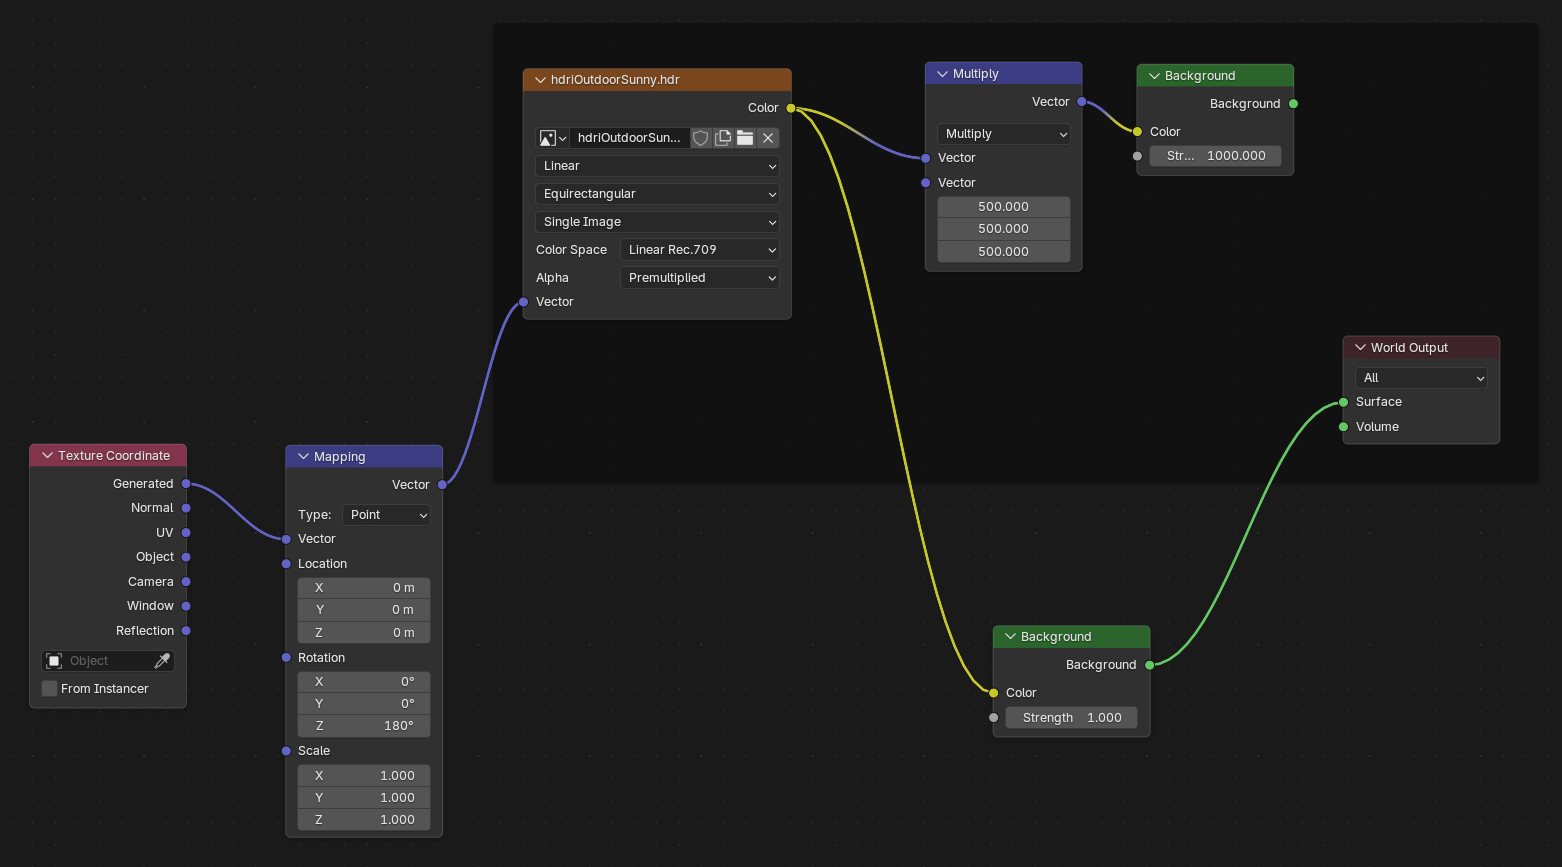
Previewing the final look
To preview how your asset will look in final renders:
- Press Shift + A → Input → Texture Coordinate.
- Press Shift + A → Utilities → Vector → Mapping and set Rotation to
(0, 0, 180). - Connect: Texture Coordinate → Mapping → Image Texture → Background (using original strength) → World Output.
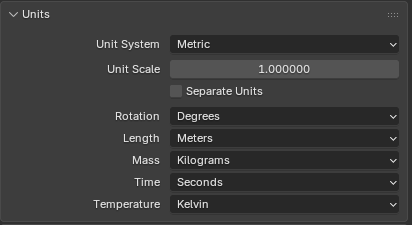
4. Set Units
- Go to Properties → Scene Properties → Units.
- Set:
- Unit System: Metric
- Unit Scale:
1 - Length: Meters
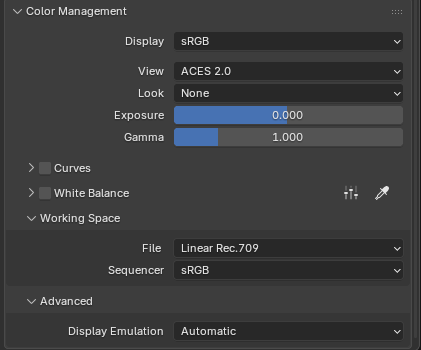
5. Color Management
Go to Render Properties → Color Management and set:
Setting | Value |
|---|---|
Display | sRGB |
View | ACES 2.0 |
Look | None |
Exposure | 0 |
Gamma | 1 |
Curves | ☐ off |
White Balance | ☐ off |
Working Space — File | Linear Rec.709 |
Working Space — Sequencer | sRGB |
Advanced — Display Emulation | Automatic |
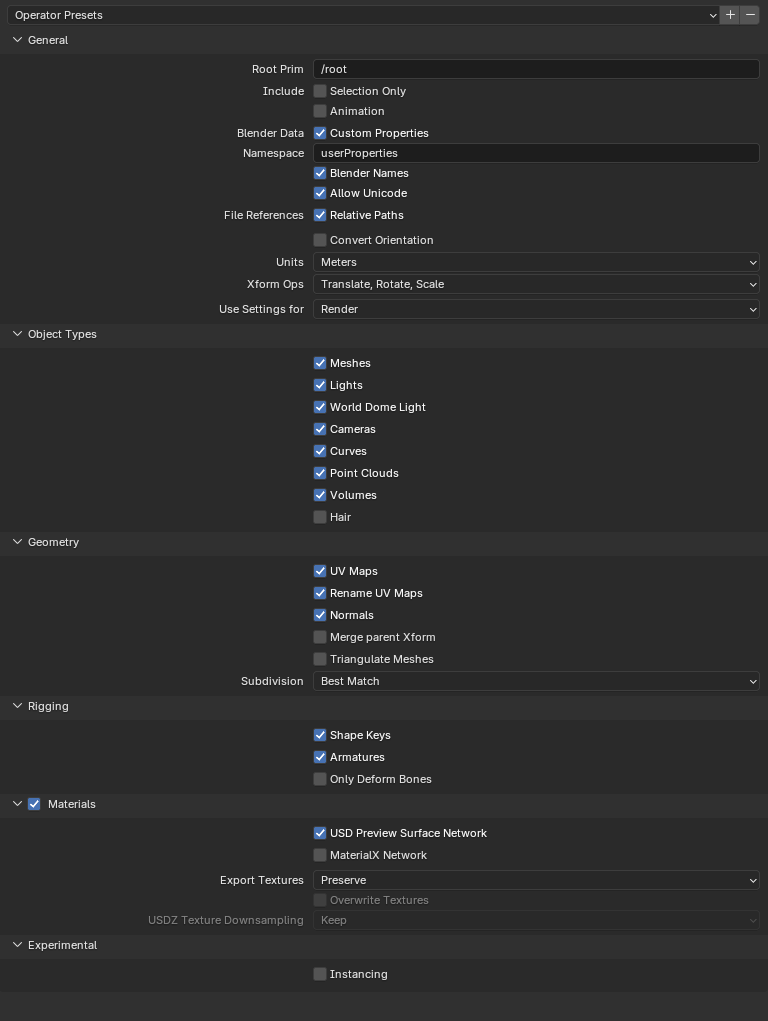
6. Export USD
- File → Save to make sure your latest changes are saved.
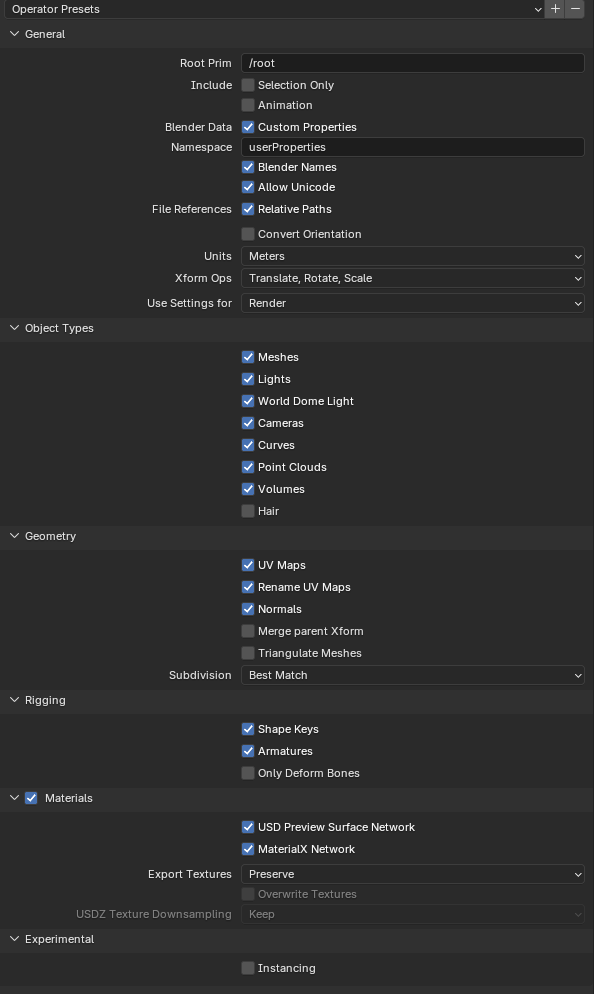
- Go to File → Export → Universal Scene Description (.usd*).
- Configure the export options:
- General → File References → ☑ Relative Paths
- Object Types → ☐ World Dome Light — disable this if you do not want a dome light in the export
- ☑ Materials
- ☑ USD Preview Surface
- ☑ MaterialX Network
- Export Textures: New path
- Set the Filename — change the default
.usdcextension to.usd. - Click Export.
Updated on: 21/04/2026
Thank you!