Exporting USD from Houdini
Tested with Houdini Core 21.0.631 (Py3.11).
Overview
The goal is to produce a single, self-contained USD file with all geometry, materials, and textures using relative paths. The general workflow is:
- Open or import your source file
- Build the scene (geometry and materials)
- Add lights
- Set units
- Set color management
- Export USD
1. Open File
- In the main menu go to File → Set Project... and choose a location that contains your texture folder.
- In the Stage network, import your source asset using one of the methods below.
USD, OBJ, or FBX (no embedded textures)
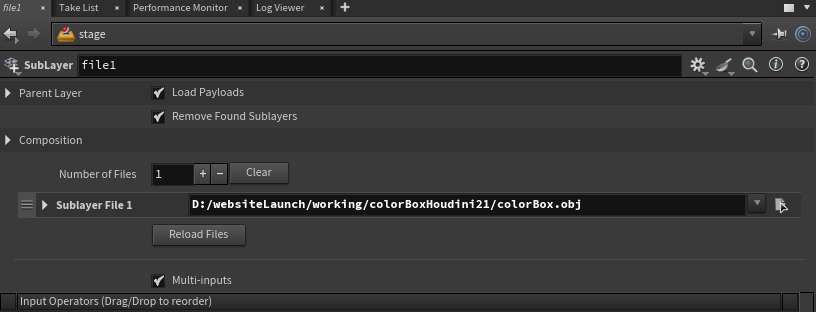
Press Tab, search for Combine, and add a SubLayer node.
- Inside the SubLayer node: Composition → Sublayer File 1 → File — select your file.
OBJ or FBX at the Geometry level (no textures)
- Press Tab → Geometry and add a Geometry node. Enter it.
- Inside the Geometry node, press Tab → File and select your OBJ or FBX.
- Add a Null node and connect the File node into it.
- Return to Stage, press Tab → SOP Import, and point it at the Null.
Inside the Geometry node you can also add a USD Export SOP to pre-configure the output path ($JOB/YourFileName.usd).
FBX with textures
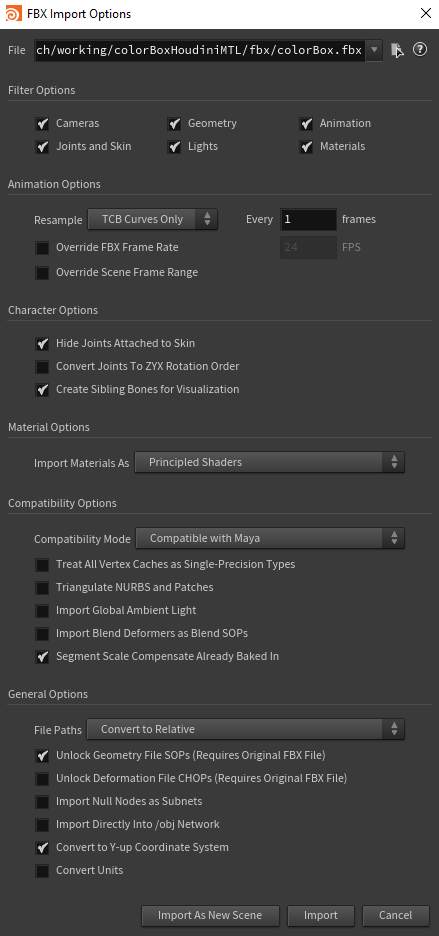
Go to File → Import → Filmbox FBX... and use these import settings:
- Material Options → Import Materials As: Principled Shaders
- General Options → File Paths: Convert to Relative
OBJ with textures
Go to File → Import → Geometry..., select your OBJ, and click Accept.
Then navigate to obj → Subnetwork → Material Network and redirect any texture paths to your project's texture folder.
2. Build Scene
Geometry
Add any additional geometry as needed (e.g. a ground plane or reference cube).
Materials
- In the Stage network, press Tab → Materials → Material Library and add a Material Library node.
- Enter the Material Library node.
- Press Tab → MaterialX → USD MaterialX Builder and enter it.
- Press Tab → MaterialX → Texture 2D → MtlX Image to add texture nodes.
- Connect and configure as desired.
Tip: Apply materials only to the meshes that require them.
Assign Materials
Back in Stage, press Tab → Materials → Assign Material and connect your material assignments.
3. Add Lights
Caution: Lights will appear significantly darker in Miris than they do in the Houdini viewport. If you want an effective Intensity of 1 and Exposure of 1, try starting with Intensity: 70, Exposure: 3.5 and adjust from there.
Dome Light (HDRI)
- Press Tab → Lights → Dome Light.
- Base Properties → Texture — select your HDRI file (
$JOB/[texture folder]/[hdri]). - Adjust Intensity and Exposure.
- Transform → Rotate — set to
(-90, 0, 0).

Distant Light
- Press Tab → Lights → Distant Light.
- Adjust Rotation, Intensity, and Exposure as desired.
Note: Disabling light visibility to camera is not yet documented. If needed, experiment with the light's Render Visibility settings.
4. Set Units
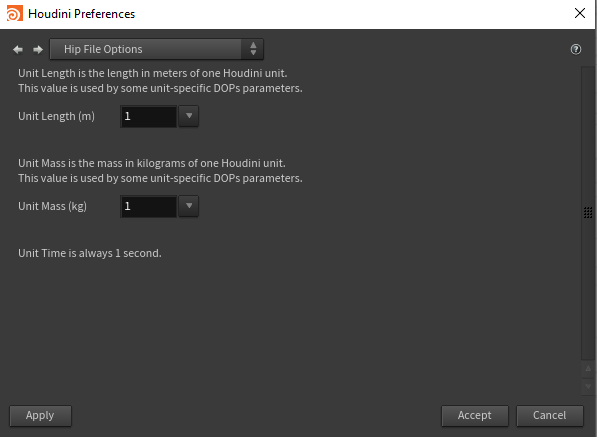
- Go to Edit → Preferences → Hip File Options.
- Set Unit Length (m):
1. - Click Apply, then Accept.
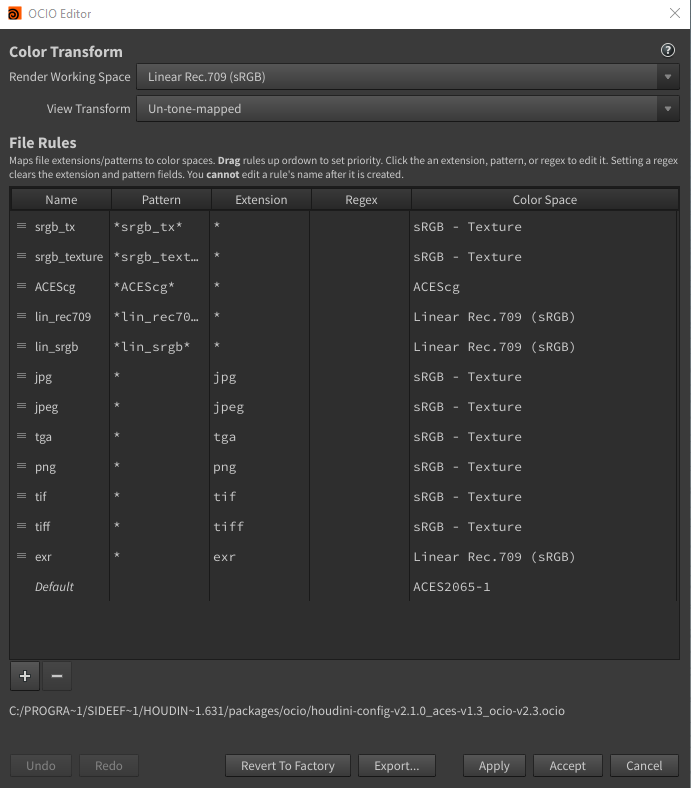
5. Color Management
- In the Display Options, set Color Correction to:
- Gamma:
2.2 - Lut: (empty)
- Apply to Background Image: ☑ enabled

- Go to Edit → OCIO Settings... and confirm your OCIO configuration.
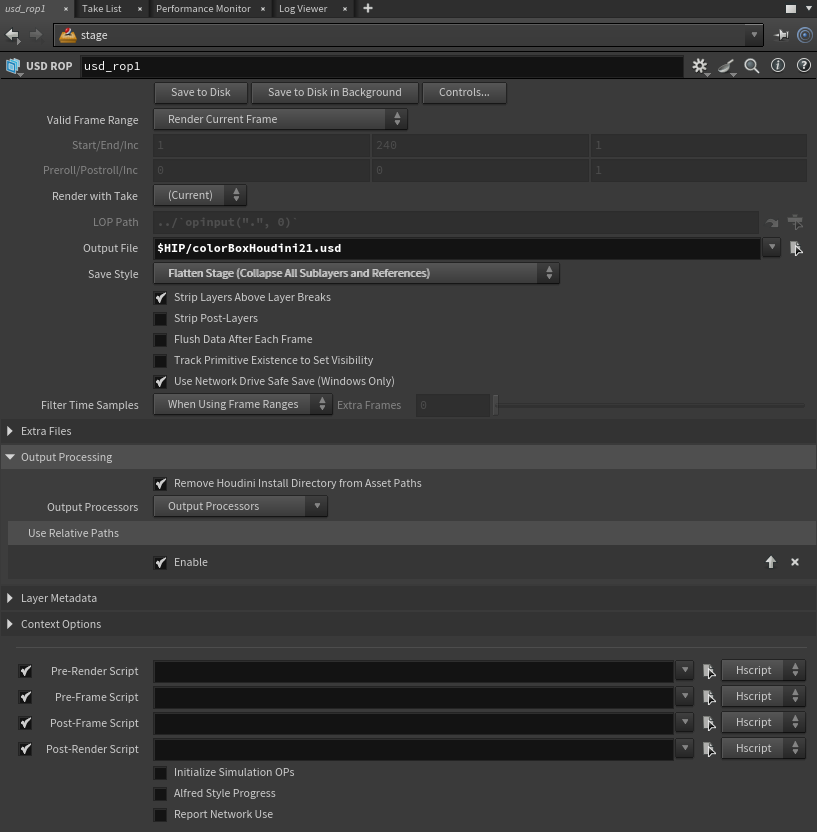
6. Save USD
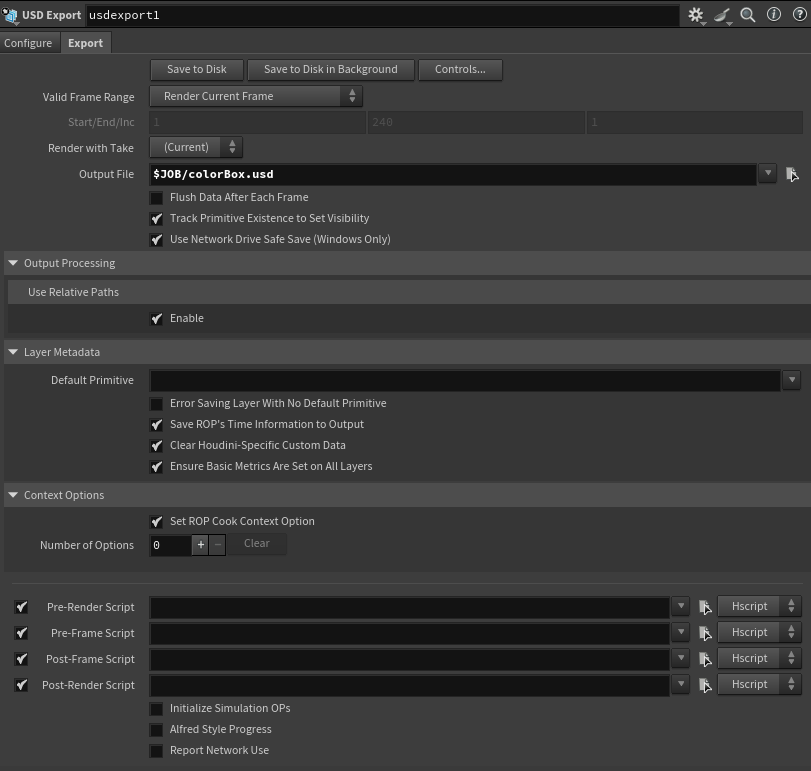
- In the Stage network, press Tab → Managers → USD ROP.
- Set Output File to
$JOB/<YourFileName.usd>. - Set Save Style to Flatten Stage (Collapse All Sublayers and References).
- Under Output Processing → Use Relative Paths, enable ☑ Enable.
- Click Save to Disk.
Updated on: 21/04/2026
Thank you!